
Welcome
Instructions
Get Started with GoCSM
Now that your basic settings are configured, let’s get GoCSM up and running.
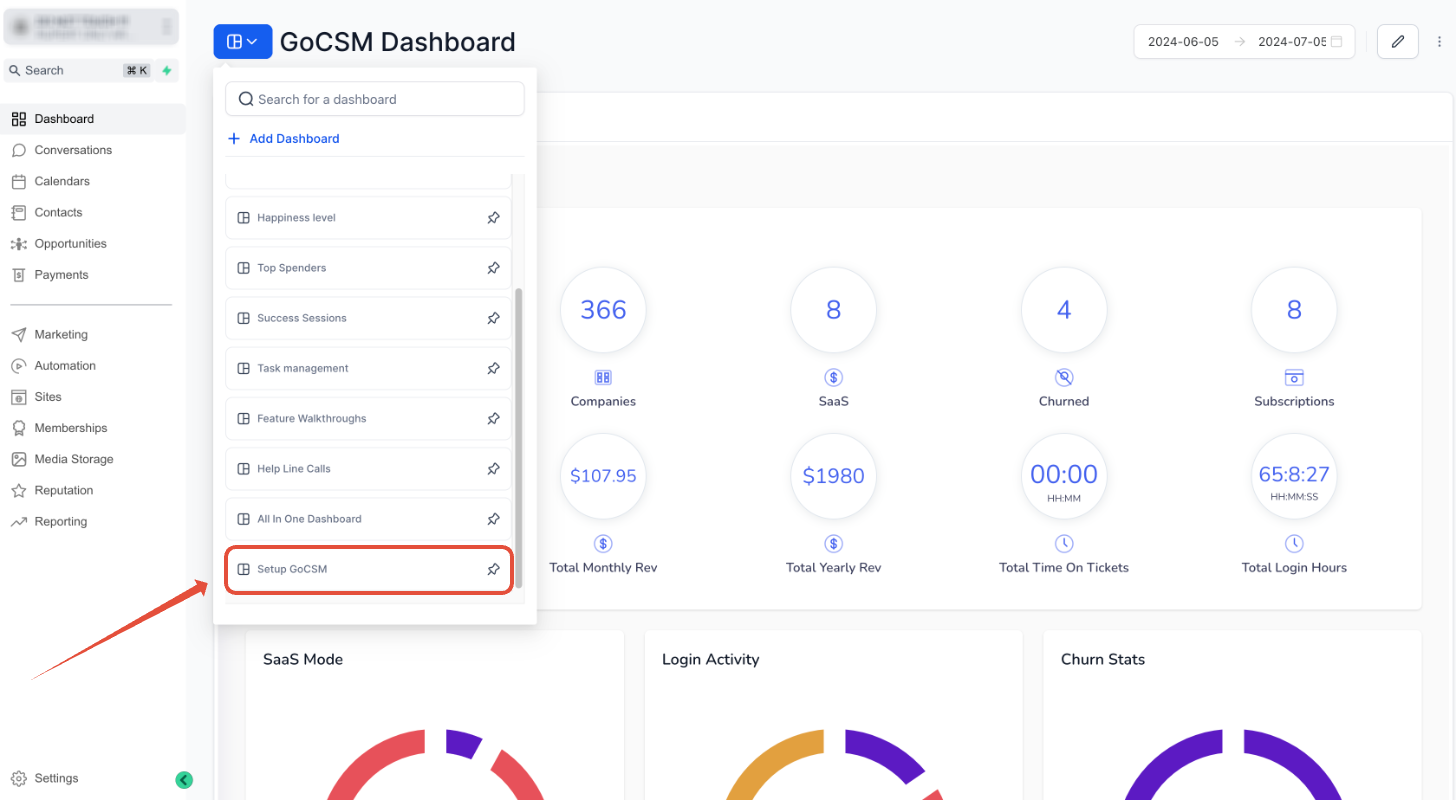
Head over to the Dashboard and select the "Setup GoCSM" dashboard to begin the following steps:
Step 1: Custom Links
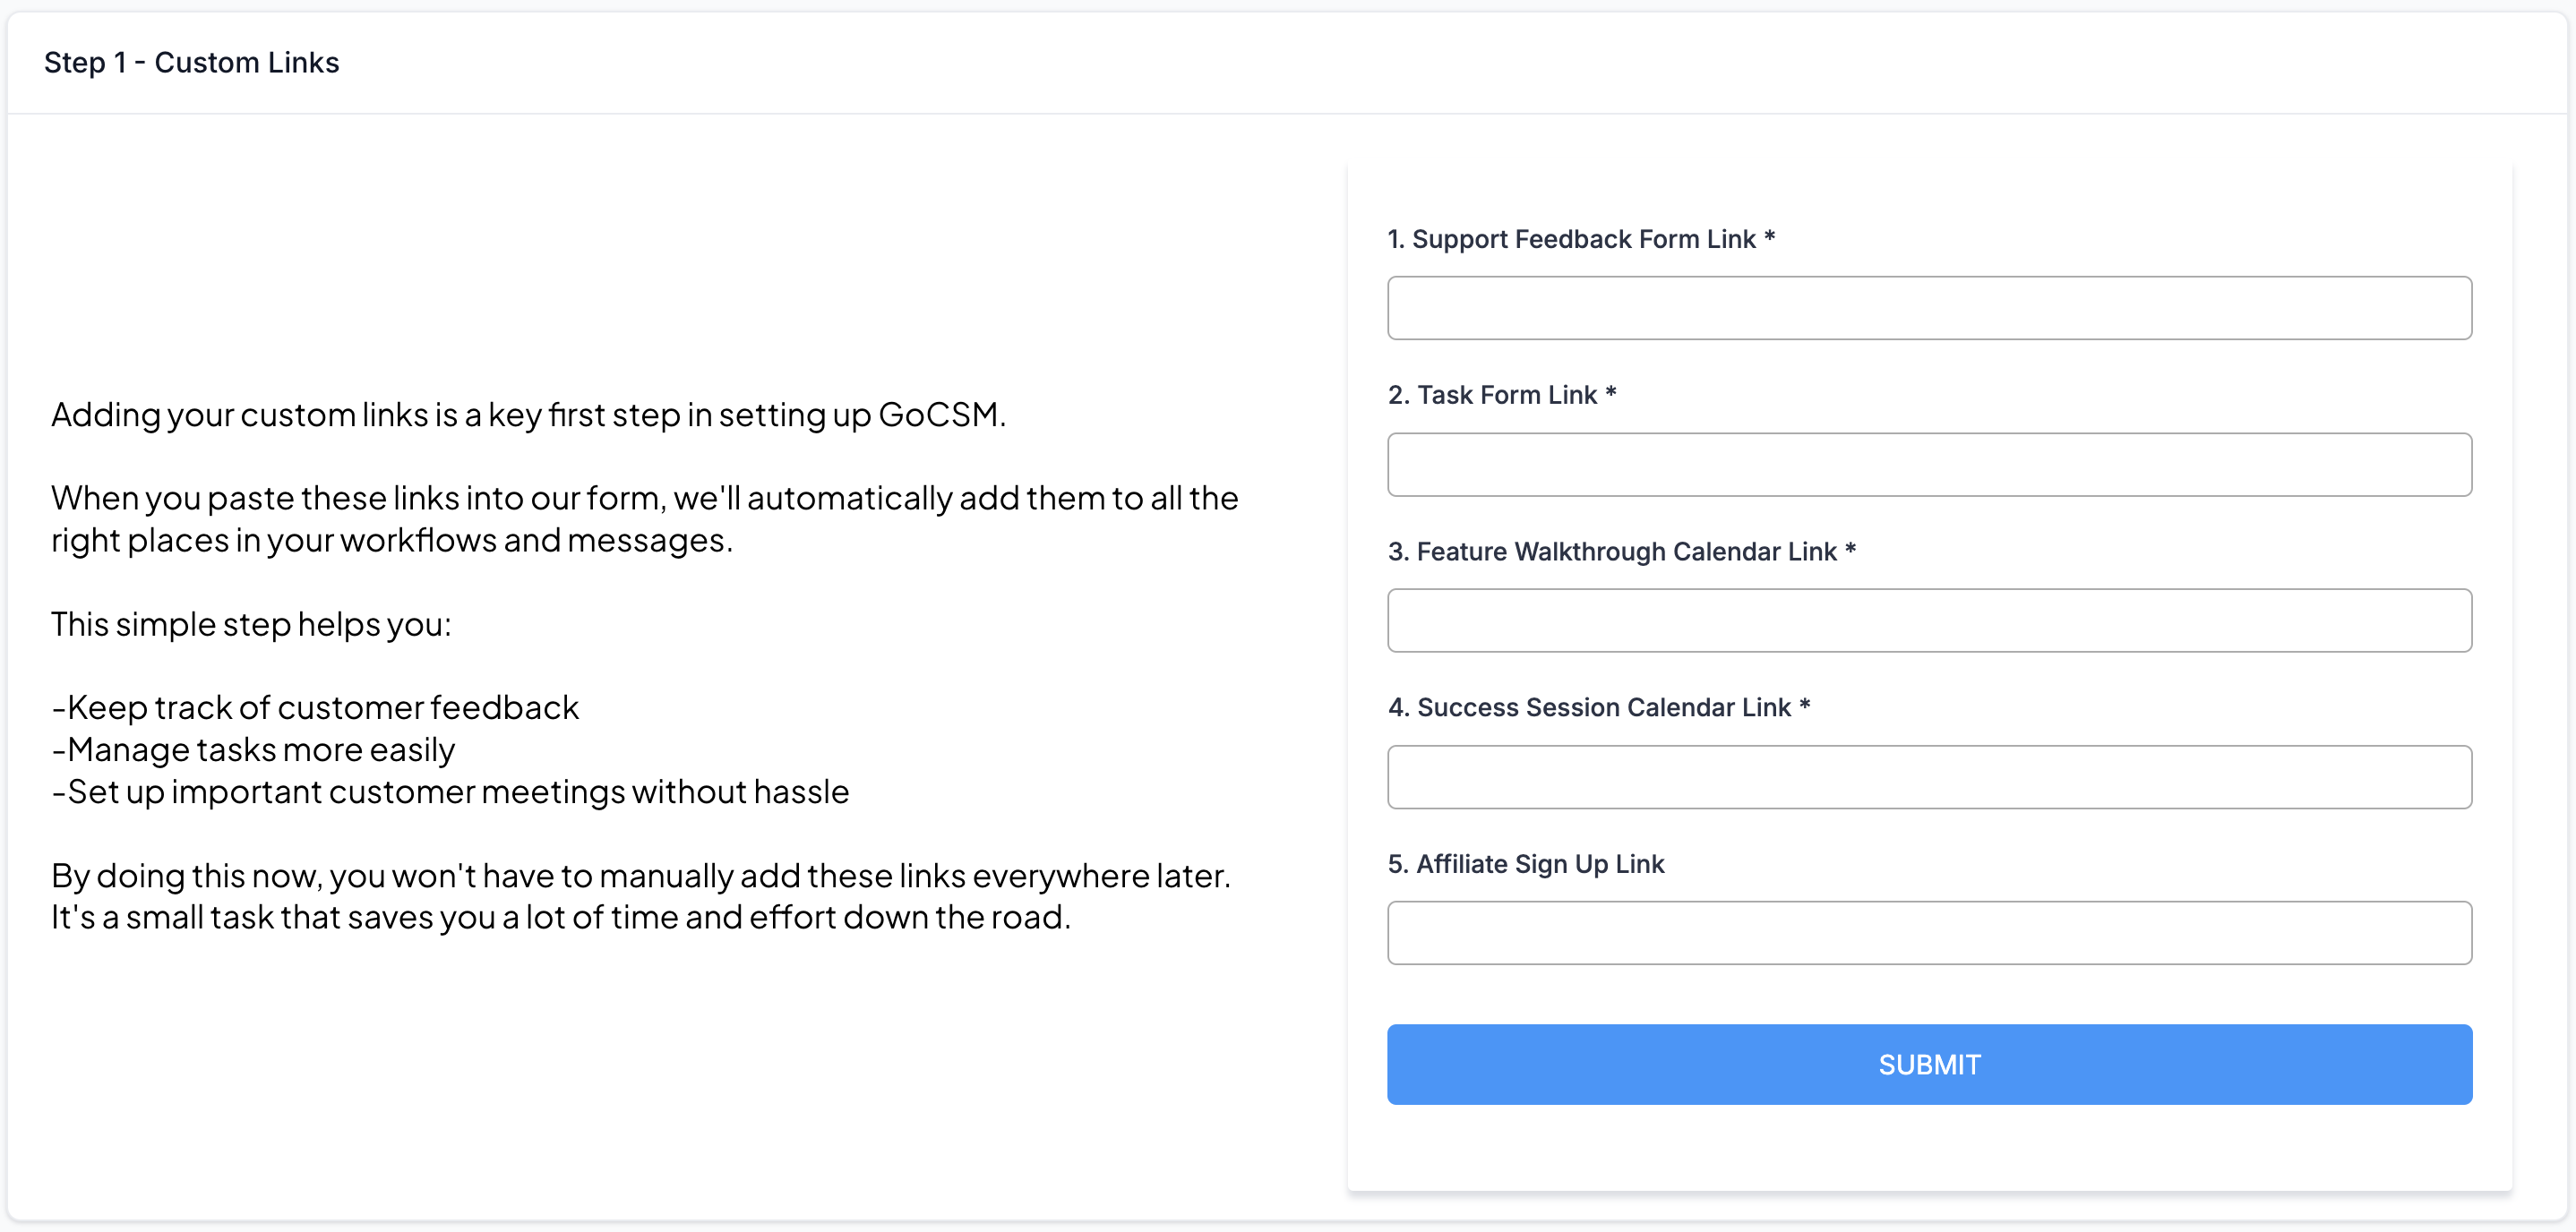
Custom links will help in tracking feedback, managing tasks, and scheduling important sessions with your customers.
Locate your custom links from your GoCSM account and paste it to the form.
Support Feedback Form Link:
Go to Sites > Forms > Builder, copy the Support Feedback preview link, and paste it into the form.
Task Form Link:
Go to Sites > Forms > Builder, copy the Task Form preview link, and paste it into the form.
Success Session Calendar Link:
Go to Settings > Calendars, activate, and copy the permanent link of the Success Session calendar, then paste it into the form.
Feature Walkthrough Calendar Link:
Go to Settings > Calendars, activate, and copy the permanent link of the Feature Walkthrough calendar, then paste it into the form.
Affiliate Sign-Up Link:
If offering an affiliate program like First Promoter, paste the signup link here.
Step 2: Integration
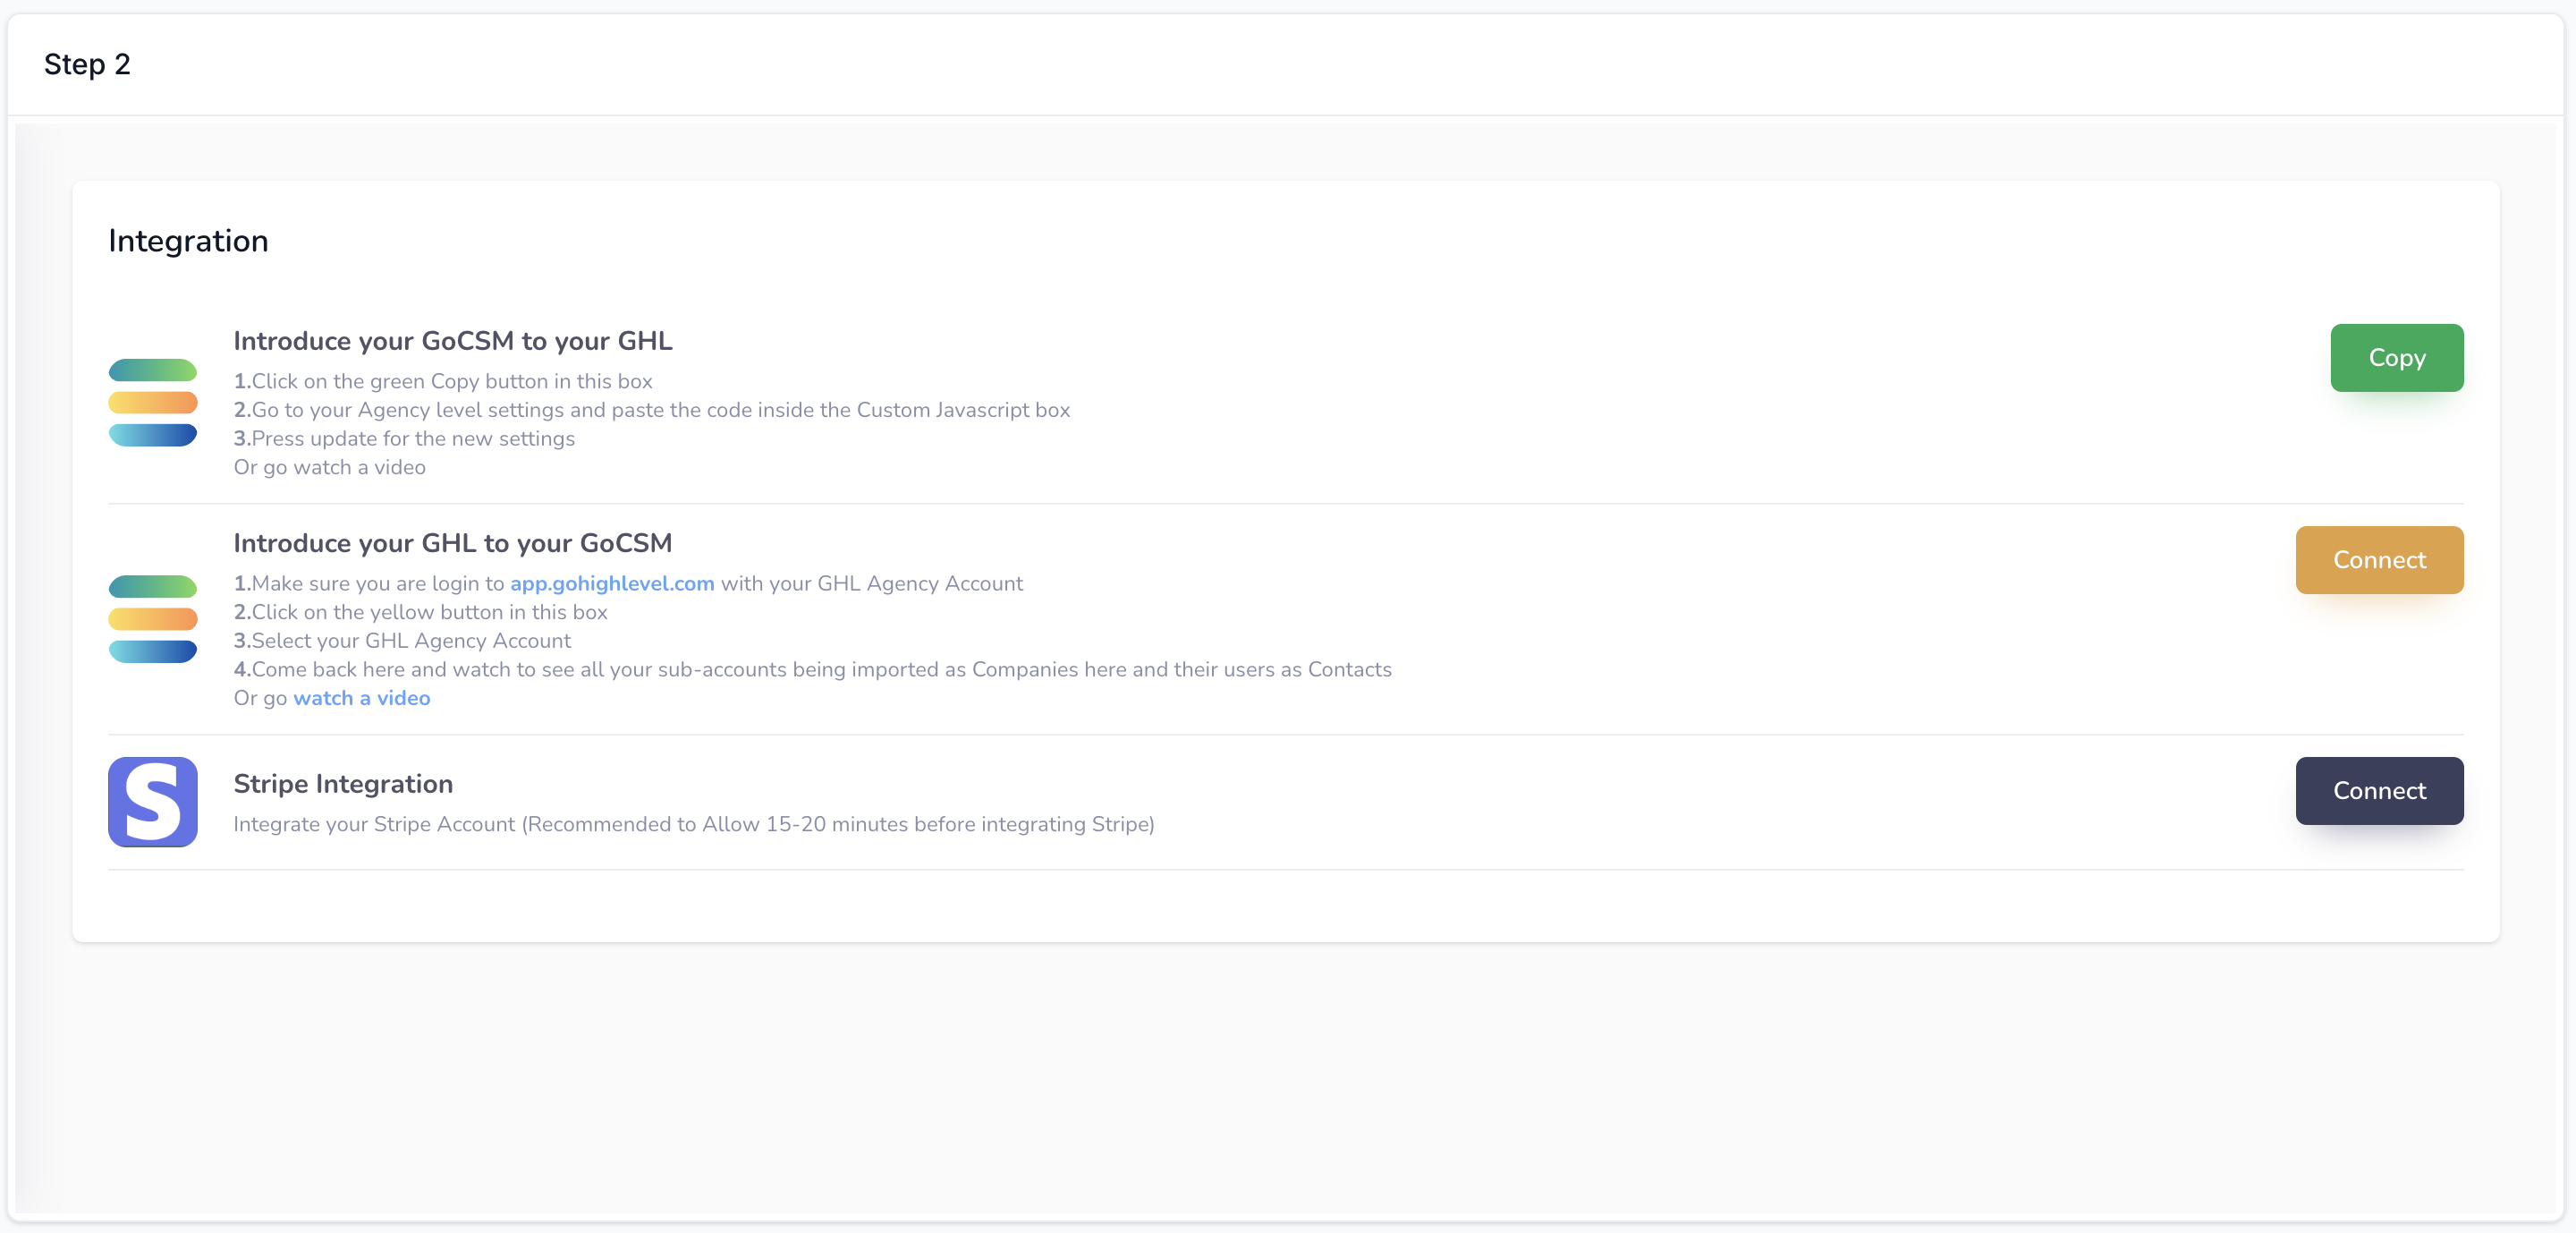
Follow the integration instructions provided on the Dashboard. These steps will ensure all parts of your GoCSM account are working together smoothly.
After connecting GHL to GoCSM. Wait 20 minutes before connecting Stripe.
Enable Scoring
Go to Settings > Manage scoring > Switch on the "Manage scoring" toggle
Step 3: Check My Setup
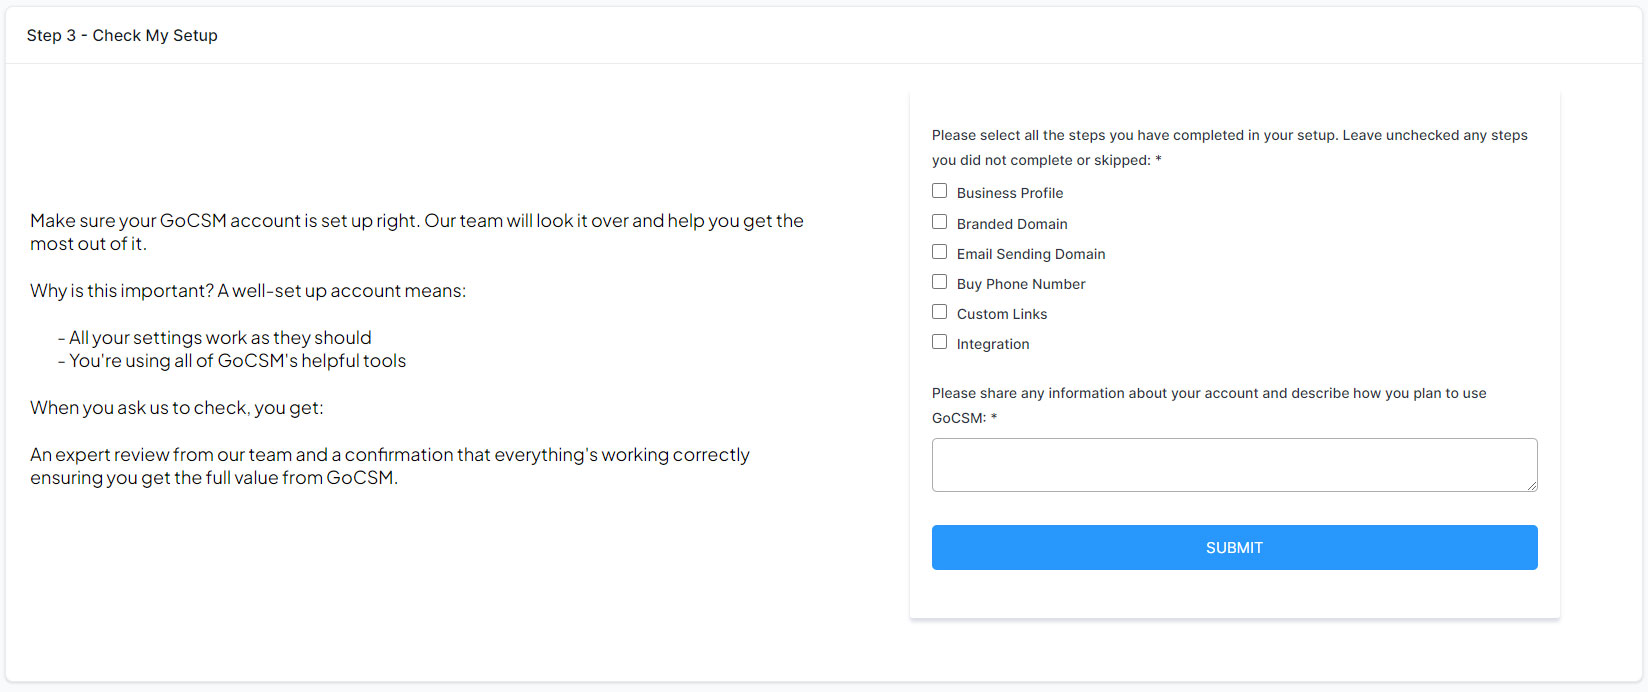
Submit the form for our team to verify that your account is completely set up and ready to use. This final step ensures everything is correctly configured for optimal performance.
©2024, GoCSM. All Rights Reserved.